How to Install 500+ Tools in Termux
Greetings, dear
readers! In this blog post, I am excited to introduce you to an incredibly
versatile tool for Termux – the DarkFly Tool. This tool simplifies installation by allowing you to install various tools effortlessly. No
need to hassle with commands like 'git clone' or scouring GitHub repositories.
Instead, you simply choose a number corresponding to the tool you want to
install from 530 pre-loaded tools.
- Python 2 must be install in termux by following command
Tool Features:
- Expansive Tool Selection: DarkFly-Tool presents you with a menu where you can choose from an extensive range of 530 tools. Whether you're a cybersecurity enthusiast or just looking to explore new utilities, DarkFly-Tool has something for everyone.
- Cross-Platform Support: Initially exclusive to Termux, DarkFly-Tool has expanded its support to include Linux OS. Now, you can install it not only on Termux but also on Ubuntu, widening its user base and making it accessible to a broader audience.
Installation
Let's start putting DarkFly-Tool on your device. First, open Termux and type in these commands:
apt update && apt upgrade
- apt update: This command updates the package lists for available packages in the Termux repositories. It ensures that the package information is current.
- apt upgrade: This command upgrades installed packages to their latest versions. It is used to keep all the installed packages up to date.
apt install git
- apt install git: This command installs the Git version control system. Git is necessary for cloning (copying) the DarkFly-Tool repository from GitHub.
git clone https://github.com/Ranginang67/DarkFly-Tool
- git clone: This essential command acts like a virtual copy machine, allowing you to duplicate an entire Git repository onto your local machine.
cd DarkFly-Tool
- cd: This versatile command allows you to change your current working directory, providing a seamless way to move around within your file structure.
- DarkFly-Tool: It changes the current directory to the one where DarkFly-Tool has been cloned. This step is necessary to navigate into the DarkFly-Tool directory for further actions.
chmod +x *
- chmod: This command is your access pass to fine-tuning file permissions, putting you in control of who gets to do what with your files.
- +x: It adds the execute permission to the specified files.
- *: This is a wildcard character that matches any file in the current directory. In this context, it gives execute permission to all files in the DarkFly-Tool directory.
python2 install.py
- python2: This command invokes the Python2 interpreter, which is a program
that reads and executes Python code.
- Install.py: It refers to
the shell script named 'install' in the DarkFly-Tool directory. Running this
script performs various installation tasks, such as setting up the necessary
environment for DarkFly-Tool.
After executing
these commands, the DarkFly-Tool should be installed and ready to use.
To run the
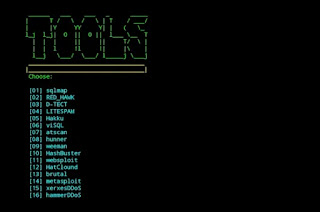
tool, simply type 'DarkFly.' You will then be presented with a menu where you
can explore over 500 amazing tools. If you wish to view all tools, select
option 1. Once you've selected it, the installation process is as
simple as choosing a tool number and hitting enter.
Once installed,
simply type 'DarkFly' to run the tool and explore the myriad options available.
Exploring SMS
Sp@m Tools:
If you're interested in the SMS sp@m tools, follow these steps:
- Type 'DarkFly' and hit enter.
- Choose option 2 to view the list of available spamming tools.
- Select any tool from the list, install it, and enjoy the experience.
In conclusion,
this guide offers a comprehensive overview of the DarkFly-Tool, showcasing its
installation process, expansive tool selection, and playful SMS sp@m tools. I
hope you find DarkFly-Tool as exciting and useful as I do. Share it with your
friends to spread the convenience and fun that DarkFly-Tool brings to the
table. Happy exploring!


